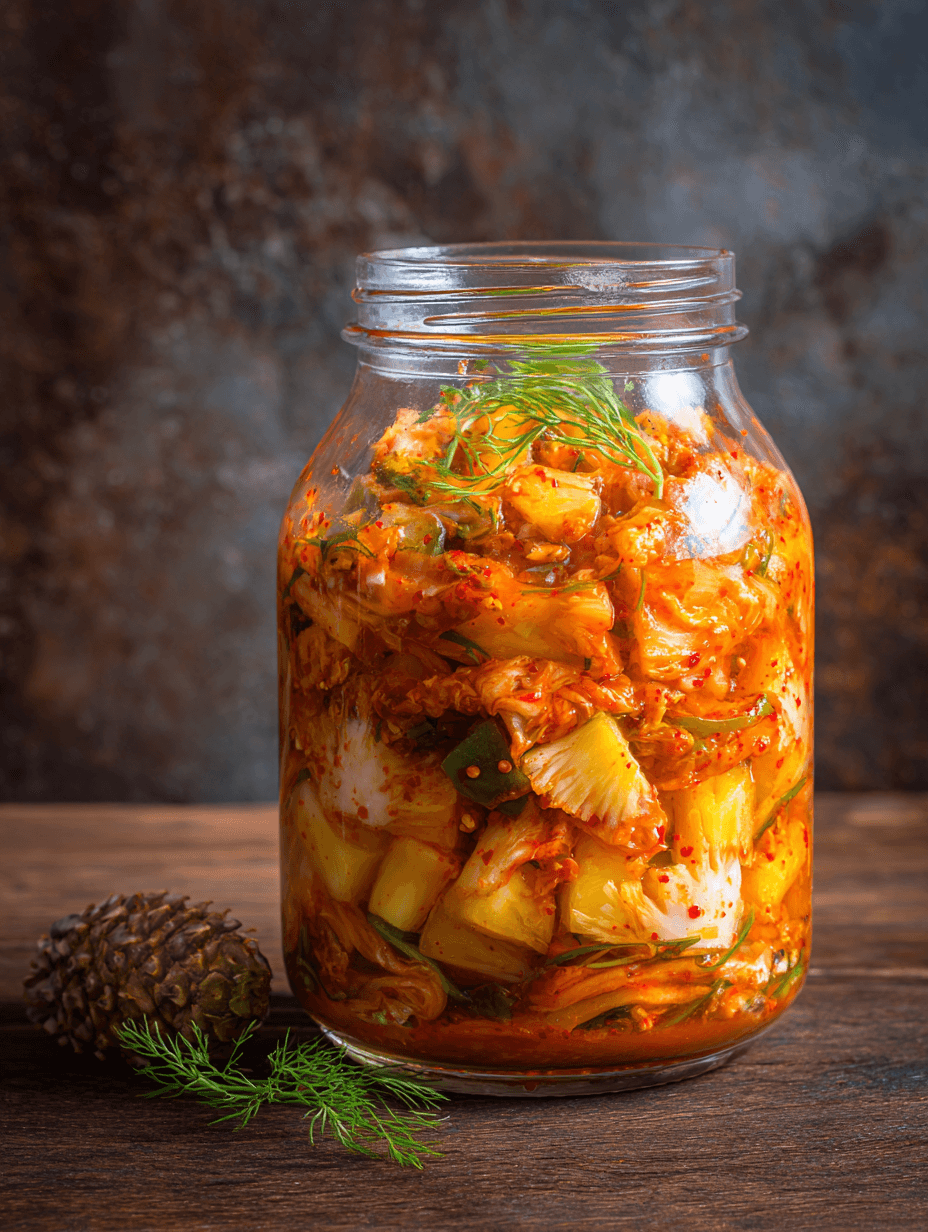
Fermented Pineapple Kimchi
If you’ve ever wished classic kimchi had a little sunshine in it, this Fermented Pineapple Kimchi is your new favorite jar of joy—sweet, spicy, tangy, vegan-friendly, and packed with gut-loving probiotics.
What Is Fermented Pineapple Kimchi, Anyway?
Fermented Pineapple Kimchi is a fun, tropical twist on traditional Korean kimchi. Instead of only cabbage and radish, we’re adding juicy fresh pineapple for a sweet and tangy kick. Think of it as a cross between classic napa cabbage kimchi and a bright fruit salsa—but fermented, fizzy, and loaded with probiotic goodness.
I started playing with this pineapple kimchi recipe after a vacation in Hawaii. Everywhere I went, there was pineapple—grilled, baked, in cocktails, you name it. When I came back to my little kitchen in the Midwest, I missed that tropical flavor. So I thought, “Why not tuck pineapple into my usual batch of homemade kimchi?” It turned out better than I imagined: sweet and spicy kimchi with little bursts of fruit that almost taste like candy once they ferment.
This fermented pineapple kimchi is:
- Naturally vegan (no fish sauce, no shrimp paste)
- Lower in sugar than you’d think (the pineapple brings natural sweetness)
- A great starter kimchi if you’re nervous around fermentation
- Flexible—make it more spicy, less spicy, more sour, less sour
I like to mix a spoonful into my rice bowls, tuck it into tacos, or pile it on avocado toast when I want something bright and energetic on the plate. And you know what? My grown kids who “don’t like kimchi” will absolutely destroy a jar of this pineapple cabbage kimchi.
Why You’ll Love This Fermented Pineapple Kimchi
- Sweet-meets-spicy flavor: The juicy pineapple softens the heat and makes this spicy pineapple kimchi incredibly balanced and addictive.
- Gut-friendly & probiotic-rich: This is a true probiotic pineapple kimchi—no vinegar, just wild fermentation for a happy microbiome.
- Naturally vegan: This vegan pineapple kimchi skips the fish sauce but keeps the depth of flavor with miso and soy sauce.
- Easy for beginners: If you’re new to fermented fruit kimchi, this recipe walks you through every step with simple cues and visuals.
- Flexible spice level: You can make it mild and family-friendly or go full-on fiery Korean pineapple kimchi with extra gochugaru.
- Low added sugar: The sweetness comes mostly from pineapple and apple; it’s an easy low sugar kimchi recipe that still tastes rich.
- Great for meal prep: One batch of homemade pineapple kimchi lasts weeks in the fridge and brightens up simple meals.
- Budget-friendly: Napa cabbage and pineapple are usually inexpensive, and the rest are pantry staples.
- Unique but still familiar: It has all the beloved flavors of classic Korean fermented pineapple cabbage kimchi, with a sunny, tropical twist.
- Fun conversation starter: Bring this tropical kimchi recipe to a party and everyone will ask, “Wait, what is THIS?”—in a good way.
Ingredients for Fermented Pineapple Kimchi
Here’s everything you’ll need to make your own fermented pineapple recipe at home. I’ll share plenty of substitution ideas along the way.
For the vegetable + fruit mix
- 1 medium napa cabbage (about 2–2.5 lb / 900–1,100 g), cored and cut into bite-size pieces
- Look for a firm, heavy cabbage with crisp, pale leaves—avoid brown spots.
- 1 tablespoon coarse sea salt per pound of cabbage (about 2–2.5 Tbsp total; do not use iodized table salt if possible)
- 2 cups fresh pineapple, cut into small chunks (about ½-inch pieces)
- Use ripe but not mushy pineapple—bright yellow, fragrant, and slightly soft when pressed.
- 1 medium carrot, julienned (matchsticks)
- 4–5 green onions, sliced into 1–2 inch pieces
- ½ small daikon radish, peeled and cut into thin matchsticks (optional but traditional and crunchy)
For the kimchi paste
- 1 small onion, roughly chopped
- 6 cloves garlic, peeled
- 1 inch piece fresh ginger, peeled
- 1 small sweet apple or Asian pear, cored and chopped (adds sweetness and helps fermentation)
- 3–4 tablespoons Korean red pepper flakes (gochugaru), more or less to taste
- For mild: 2–3 Tbsp; for spicy pineapple kimchi: 4–5 Tbsp.
- 2 tablespoons white or yellow miso paste (adds umami instead of fish sauce)
- 2 tablespoons low-sodium soy sauce or tamari (for gluten-free)
- 1–2 tablespoons coconut sugar, cane sugar, or brown sugar (optional, depending on your pineapple sweetness)
- 3–4 tablespoons water, as needed to blend into a thick paste
Equipment
- 1 large non-reactive bowl (glass or stainless steel)
- Cutting board and sharp knife
- Kitchen scale (helpful but not essential)
- Gloves (the pepper paste can sting your hands)
- 1–2 wide-mouth glass jars (quart-size or 1-liter jars work well) with lids
- A small jar or fermentation weight to press the kimchi under the brine
A Quick Visual: What Your Kimchi Will Look Like
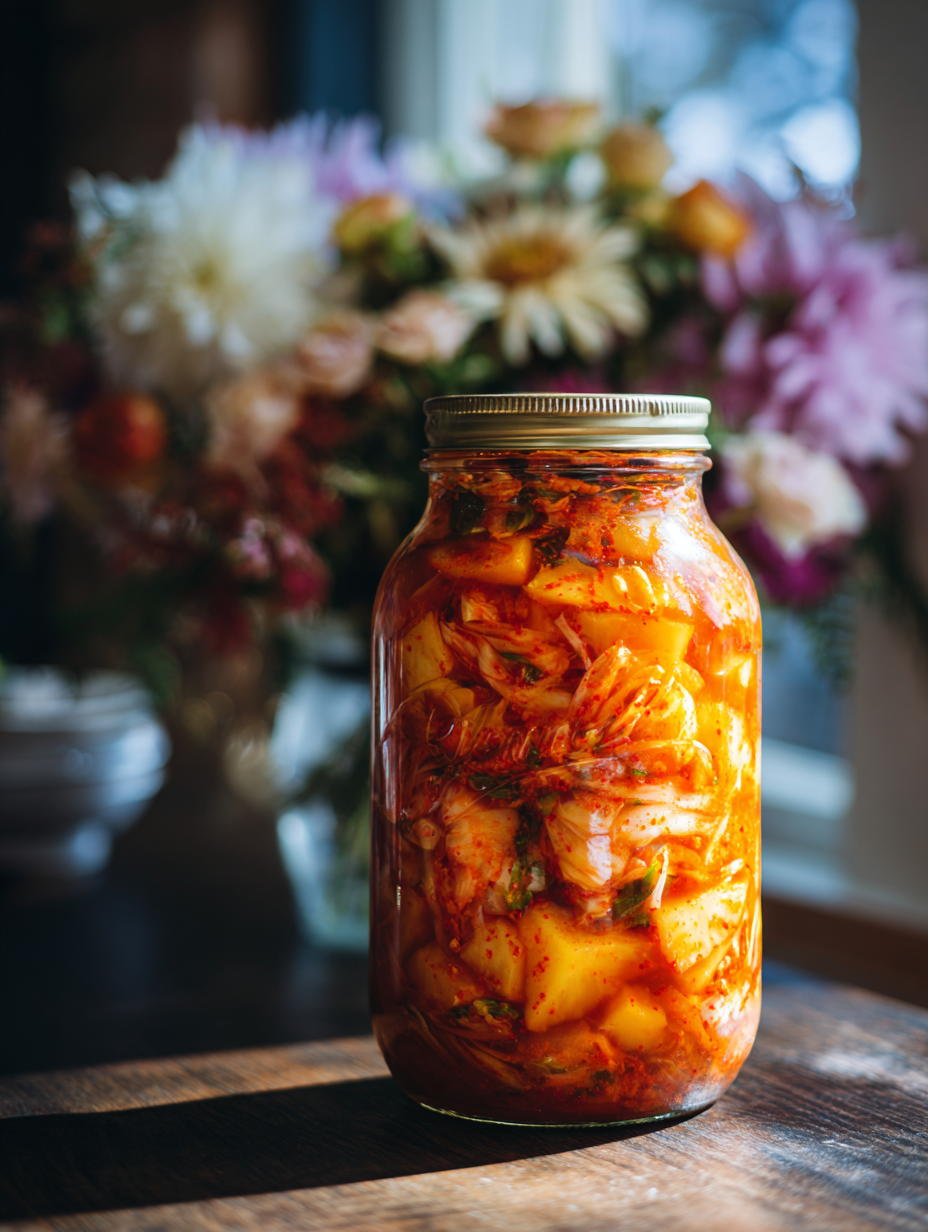
You’re looking for glossy cabbage, bright red paste clinging to everything, and cheerful golden pineapple chunks peeking through.
Step-by-Step Directions for Homemade Pineapple Kimchi
Let’s walk through this slowly. Fermentation sounds mysterious, but it’s really just salt, time, and a little patience.
1. Prep and salt the cabbage
- Rinse the napa cabbage and remove any limp outer leaves.
- Slice the cabbage lengthwise into quarters, remove the core, then cut into 1–2 inch pieces.
- Place the chopped cabbage in a large bowl and sprinkle with the coarse sea salt, tossing as you go. Use your hands to massage the salt into the leaves for a few minutes.
- You’ll feel the cabbage start to soften and release water—this brine is your built-in preservative.
- Let the cabbage sit for 1½–2 hours, tossing every 20–30 minutes so it salts evenly.
You’re looking for cabbage that’s wilted but still crunchy when you bite it. Think “softened salad,” not soggy.
2. Rinse and drain the cabbage
- After salting time, pour the cabbage into a colander and rinse thoroughly under cool water 2–3 times to remove excess salt.
- Let it drain well—press gently with your hands to squeeze out extra water.
- Too much water can dilute your kimchi paste and weaken the brine.
While that drains, you can prep the rest.
3. Prep the pineapple and vegetables
- Cut the pineapple into small bite-sized chunks, about ½ inch. Set aside.
- Julienne the carrot and daikon into thin matchsticks. Slice the green onions into 1–2 inch pieces.
- Try to keep the pieces relatively similar in size so everything ferments at the same rate.
You’ll notice already how pretty this pineapple cabbage kimchi is going to be—the pop of yellow next to the orange carrot and green onion is so cheerful.
4. Make the kimchi paste
- In a blender or food processor, add the onion, garlic, ginger, apple (or pear), miso, soy sauce, sugar (if using), and gochugaru.
- Blend until you get a thick, smooth-ish paste. Add 3–4 tablespoons of water, a little at a time, if it’s too thick to blend.
- The texture should be like a loose tomato paste—spreadable, not runny.
Taste the paste (careful, it’s spicy!). You’re checking for balance: salty, a little sweet, deeply savory, and warmly spicy. Remember, the pineapple will add more sweetness, and the fermentation will increase tanginess, so it’s okay if it tastes a bit strong right now.
5. Combine everything
- Place the drained cabbage back into the large bowl. Add the carrot, daikon, green onions, and pineapple chunks.
- Put on your gloves and spoon the kimchi paste over the top.
- Use your hands to rub the paste into the cabbage and vegetables, turning and pressing until everything is evenly coated.
- Take your time here. Fermented pineapple kimchi tastes better when every leaf and chunk is bathed in paste.
You’ll start to see more brine forming at the bottom as you mix—that’s a good sign.
6. Pack into jars
- Pack the mixture tightly into your clean glass jars, pressing down with your fist or a spoon after every few scoops.
- You want to eliminate air pockets and encourage the brine to rise up and cover the solids. Leave at least 1–1½ inches of headspace at the top of the jar.
- If needed, pour any remaining brine from the bowl into the jar. The vegetables should be submerged under liquid; if they’re not, let the jar sit out for 20–30 minutes and press again, or add 1–2 tablespoons of filtered water mixed with a pinch of salt.
- Place a smaller jar or a fermentation weight inside the main jar to keep the pineapple kimchi pressed under the brine.
Wipe the rim, loosely cover with a lid (or use an airlock-style lid), and you’re all set.
7. Ferment at room temperature
- Set the jar on a plate or tray (it may bubble and leak a little) and keep it at cool room temperature, around 65–75°F (18–24°C).
- Let your probiotic pineapple kimchi ferment for 2–5 days, depending on your taste and your kitchen’s temperature.
Each day:
- Gently open the jar (“burp” it) to release gas, then press the kimchi back under the brine with a clean spoon.
- Taste a small piece starting around day 2. When it’s pleasantly tangy, with some fizz and a nice balance of sweet and sour, it’s ready.
Warmer kitchens will speed things up; cooler kitchens will slow things down. Let your tongue be the judge.
8. Move to the fridge
- Once your fermented pineapple kimchi tastes how you like it, seal the jars and move them to the refrigerator.
- It will continue to slowly ferment and develop flavor in the fridge, but the cold will keep it from going too sour too fast.
I find it’s absolutely perfect after about 7–10 days total, but it’s delicious at every stage—just different.
Servings & Timing
- Yield: About 1.5–2 quarts (roughly 24–32 servings, 2 tablespoons each)
- Prep Time: 30–40 minutes active time (chopping, mixing)
- Salting Time: 1½–2 hours
- Fermentation Time: 2–5 days at room temperature
- Total Time: About 3–7 days (mostly hands-off)
It sounds long, but you’re only working for about 40–45 minutes. The rest is quiet magic happening in the jar while you go live your life.
Fun Variations on Fermented Pineapple Kimchi
Once you’ve made this easy pineapple kimchi once or twice, you’ll probably want to play. Here are a few ideas I love:
- Extra-tropical kimchi: Add ½ cup of diced mango or papaya along with the pineapple for a truly fruit based kimchi.
- Garlicky heat-lover’s version: Add 2–3 extra cloves of garlic and an extra tablespoon of gochugaru for a super spicy pineapple kimchi.
- Ginger-forward gut booster: Double the ginger and add a tablespoon of fresh turmeric for a bold, anti-inflammatory healthy kimchi recipe.
- Low-sodium tweak: Reduce the salt by about 20% and ferment a bit longer (4–6 days) to let the sourness develop more.
- Crunch-lover’s batch: Add extra daikon and a handful of sliced red cabbage to get a rainbow crunchy pineapple napa cabbage kimchi.
- Cilantro-lime fusion: Stir in a small handful of chopped cilantro and a squeeze of lime right before serving for a taco-night twist.
Storage & Make-Ahead Tips
One of my favorite things about this Korean pineapple kimchi is how well it keeps. It’s a natural make-ahead hero.
Fridge storage:
- Store your kimchi in glass jars with tight-fitting lids, fully submerged under the brine.
- It will keep in the refrigerator for 3–4 weeks, often longer, becoming more sour over time.
Freezer storage:
- You can freeze kimchi, but freezing will soften the texture. If you do, use it in cooked dishes (fried rice, soups, stews) instead of eating it straight from the jar.
- Freeze in smaller portions in freezer-safe containers for up to 2–3 months.
Make-ahead notes:
- This is, by nature, a make-ahead recipe—the flavor is better a week after you make it.
- If you’re planning to serve it for a specific event (say, a Korean-inspired barbecue or taco bar), start your fermented pineapple kimchi at least 5–7 days ahead.
Serving from the jar:
- Always use a clean utensil.
- Make sure you press leftovers back under the brine before closing the lid. If any pieces poke out for too long, they can get moldy or discolored.
Notes, Tips & Little Lessons from My Kitchen
Salt matters more than you think.
Non-iodized sea salt or kosher salt works best. Iodized table salt can make fermentation less predictable and sometimes adds a faint metallic taste.Don’t panic about bubbles.
Fermented fruit kimchi gets bubbly—especially with pineapple and apple in there feeding the bacteria. If you see little bubbles and the kimchi rises in the jar, that’s a sign the probiotics are having a party.Watch the sweetness.
Pineapple varies wildly—some are candy-sweet, some are more tart. If yours is very sweet, you can skip the added sugar entirely and still get a tangy pineapple kimchi with good fermentation.Adjust to your climate.
I live in a place with real winters and real summers. In the summer, my Korean fermented pineapple kimchi is ready in 2–3 days. In January, it might take 5–7 days on my kitchen counter.How to keep it crunchy.
Don’t over-salt or over-ferment at warm temperatures. Make sure your cabbage is drained well after rinsing, and keep jars in a cooler spot in your kitchen if possible.Smell is your friend.
Good kimchi should smell pleasantly sour, garlicky, and a bit fruity in this case. If it ever smells rotten, cheesy in a bad way, or you see fuzzy mold, trust your instincts and toss it.Use the brine!
The brine is a probiotic goldmine. Whisk a tablespoon or two into salad dressings, mix into mayo for a tangy sandwich spread, or splash into soups for extra depth.
Frequently Asked Questions About Fermented Pineapple Kimchi
1. Is pineapple safe to ferment?
Yes. Pineapple ferments beautifully, especially when paired with cabbage and the right amount of salt. The natural sugars feed beneficial bacteria, giving you a bubbly, probiotic-rich fermented pineapple recipe.
2. Will the kimchi be very sweet because of the fruit?
Not overly. The sweetness mellows as it ferments, and the sourness increases. You’ll end up with a sweet and spicy kimchi that’s balanced, not sugary.
3. Can I use canned pineapple instead of fresh?
You can, but fresh is much better. If you use canned, choose pineapple in juice, not syrup, and rinse it well—your vegan pineapple kimchi may ferment faster because of the extra sugars.
4. What if my kimchi isn’t bubbling?
Sometimes bubbles are subtle. If it smells a bit sour, tastes tangy, and you see slight activity or a rising brine line, it’s fermenting. Cooler kitchens just ferment more slowly.
5. How do I know if my kimchi has gone bad?
If you see fuzzy mold on top, smell something truly rotten, or notice strange colors (blue, black, or pink fuzz), it’s time to throw it out. A strong but pleasant sour smell is normal.
6. Can I make this without any spice for kids?
Yes—reduce gochugaru to 1 tablespoon or even 1 teaspoon, or replace it with a mild paprika for color. You’ll still get a tangy pineapple kimchi, just softer and more kid-friendly.
7. Is this kimchi truly vegan?
Yes, this recipe is designed as a vegan pineapple kimchi, using miso and soy sauce instead of fish sauce or shrimp paste. Just double-check your miso and soy sauce labels if you have dietary restrictions.
8. How can I use leftover pineapple kimchi?
Try it on grain bowls, in kimchi fried rice, over avocado toast, tucked into quesadillas, or on top of grilled tofu or fish. It’s also great spooned onto burgers or hot dogs for a fun twist.
Wrapping It Up (and Tucking It in the Fridge)
Fermented Pineapple Kimchi brings together so many things I love: the comfort of traditional Korean-style kimchi, the brightness of tropical fruit, and the quiet satisfaction of a jar full of living, gut-friendly goodness humming along in the fridge. It’s easy, wildly flavorful, and just a little unexpected—exactly the kind of homemade pineapple kimchi that turns a simple bowl of rice or noodles into something special.
If you try this recipe, I’d love to hear how your batch turned out—and what you served it with. Leave a comment, share your own twists on this tropical kimchi recipe, and then wander through a few of my other fermented favorites for your next homemade, gut-happy project.
Read next
Salads Sides
Best Low Carb Air Fryer Asparagus
Discover the best low carb air fryer asparagus, crisp, tasty, and quick for easy keto meals.
Salads Sides
Low-Carb Lemon Garlic Green Beans
Discover low carb lemon garlic green beans—tender, bright, and easy to prepare for a quick weeknight side.
Salads Sides
Mashed Cauliflower
Discover mashed cauliflower as a light, creamy side that is low-carb and tasty - easy to make.
Salads Sides
No Carb Bacon Wrapped Asparagus
Discover no carb bacon wrapped asparagus, crisp keto-friendly bites that are easy to make and full of flavor.

Salads Sides
No Carb Bacon Wrapped Asparagus Bites
Discover no carb bacon wrapped asparagus, crisp, savory bites that cut carbs.

Salads Sides
30 Minute Low Carb Antipasto Salad
Discover a tasty 30 minute low carb antipasto salad for quick, healthy weeknights.