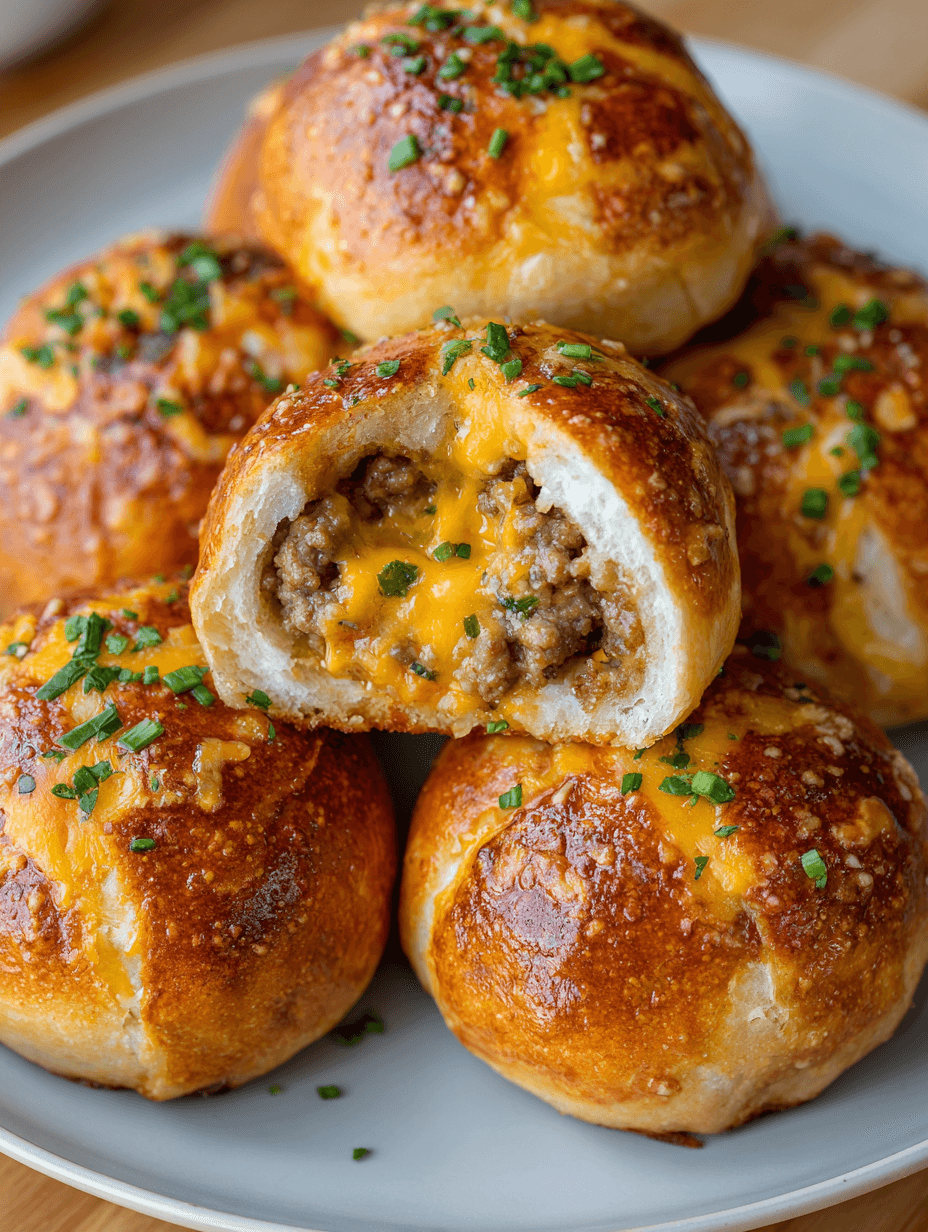
Cheeseburger Bombs: The Gooey, Crowd-Pleasing Bite You’ll Make Again and Again
If you love a good juicy cheeseburger but don’t always want the mess, these Cheeseburger Bombs are about to become your new favorite thing—bite-sized, cheesy, baked, and perfect for parties, game day, or a fun family dinner.
What Are Cheeseburger Bombs, Anyway?
Cheeseburger Bombs are exactly what they sound like: little stuffed cheeseburger bites wrapped in biscuit dough (or crescent roll dough), filled with seasoned ground beef and gooey cheese, then baked until golden and bubbly. Think of them as mini cheeseburger bombs that are ready to pull apart and share.
They’re everything you love about a classic cheeseburger—savory ground beef, melty cheese, maybe a little onion and pickle—tucked into soft, fluffy dough. These homemade Cheeseburger Bombs are especially handy when you’re feeding people who like to snack and wander. I make them a lot for game day cheeseburger snacks, backyard parties, and “snacky dinner night” when everyone is picking at the kitchen island.
You can keep them simple for the kids or dress them up with fun toppings for the adults. I’ve made these baked Cheeseburger Bombs with biscuit dough, with crescent roll dough, and even in a cast-iron skillet as skillet cheeseburger bombs—trust me, they disappear either way.
And if you’re trying to cut down on fast food runs, these cheesy beef biscuit bombs give you all the flavor of takeout burgers with ingredients you actually recognize. You control the salt, the cheese, and the fillings, which I always appreciate now that I’m cooking for grown kids, their friends, and occasionally very picky grandkids.
Why You’ll Love This Cheeseburger Bombs Recipe
Let’s get right to the good stuff. Here’s why this easy cheeseburger bombs recipe is such a winner:
- Family-friendly and picky-eater approved – Even hesitant kids will eat these mini cheeseburger bombs without a fuss.
- Perfect party appetizer – These pull apart cheeseburger bombs are made for game day, potlucks, and casual get-togethers.
- Uses simple, everyday ingredients – Ground beef, biscuit dough, cheese; nothing fancy or hard to find.
- Make-ahead friendly – Prep the stuffed cheeseburger bites early, then bake right before serving.
- Flexible and customizable – Swap cheeses, add bacon, sneak in veggies, or tweak the spices.
- Great for portion control – Each little biscuit cheeseburger bite is a built-in portion, which helps if you’re watching how much you’re eating.
- Kid-friendly cheeseburger snacks – Easy for little hands to hold and dip, no big burger bun sliding apart.
- Freezer-friendly – These oven baked burger bombs freeze and reheat beautifully for busy nights.
If you’re anything like me and you enjoy recipes that feel fun but don’t ask you to hover over the stove, these Cheeseburger Bombs will fit right into your regular rotation.
Ingredients for Cheeseburger Bombs
Here’s exactly what you’ll need to make this cheesy, pull-apart skillet of goodness. I’ll include a few substitutions and tips as we go.
1 lb (450 g) ground beef
- I like 80/20 for juicier ground beef cheeseburger bombs, but 90/10 works if you want them a bit lighter.
1 small yellow onion, finely diced
- Red onion works too; just mince it small so it softens quickly.
2 cloves garlic, minced
- Garlic powder can pinch-hit (about ½ teaspoon), but fresh gives deeper flavor.
1 tablespoon Worcestershire sauce
- Adds that classic “burger” savoriness; if you’re sensitive to it, use soy sauce or coconut aminos.
2 tablespoons ketchup
- Gives that nostalgic cheeseburger flavor. BBQ sauce works for a smokier twist.
1 tablespoon mustard (yellow or Dijon)
- Yellow tastes more like a classic fast-food burger, Dijon is a little sharper.
½ teaspoon smoked paprika (optional but recommended)
- Adds a light smokiness that makes the filling taste like it came off a grill.
½ teaspoon salt
- Start here and adjust to taste after cooking the beef mixture.
¼ teaspoon black pepper
1½–2 cups shredded cheddar cheese
- I use sharp cheddar; you can mix in mozzarella or American cheese for extra melt. Cheese stuffed burger bombs are more fun when the cheese pulls!
2 (16.3 oz) cans refrigerated biscuit dough
- Use the “flaky layers” biscuits when you can—they seal better and puff nicely. This makes about 16 cheeseburger biscuit bites.
- Crescent roll cheeseburger bombs: You can swap biscuits for two tubes of crescent roll dough, cut into squares.
2 tablespoons melted butter
- For brushing on top—salted butter gives great flavor.
½ teaspoon garlic powder
½ teaspoon dried parsley or Italian seasoning
- For a pretty, herby finish.
Optional extras for stuffing or topping
- Diced pickles (for a tangy cheeseburger bite)
- Cooked, crumbled bacon (for bacon cheeseburger bombs)
- Sesame seeds (sprinkle on top so they look like mini burger buns)
You can see from the ingredient list that these really are easy cheeseburger bombs. Nothing unusual, nothing expensive, just pantry and fridge staples turned into something a little more fun.
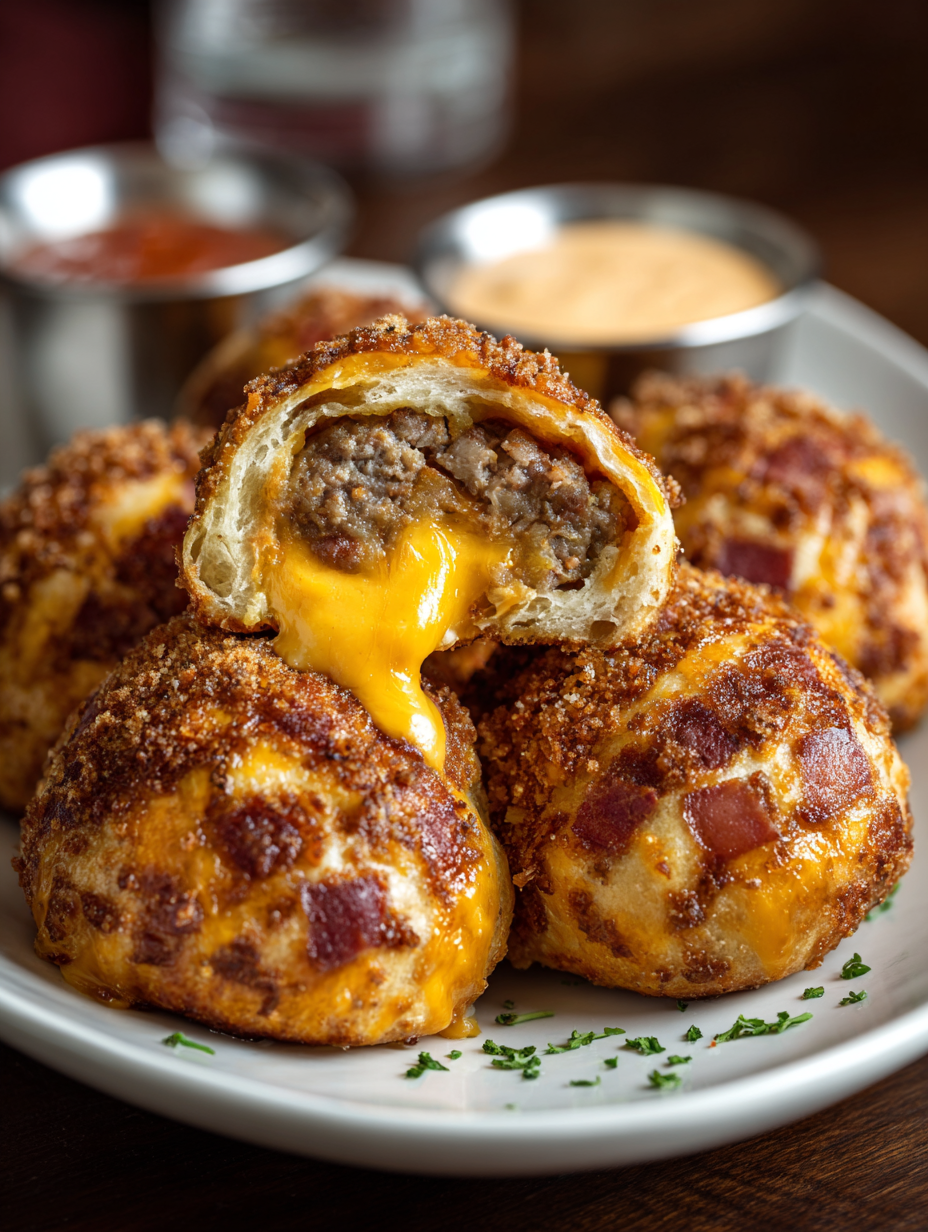
Step-by-Step Directions: How To Make Cheeseburger Bombs
Let’s walk through it together. Once you’ve done it once, you’ll be stuffing these biscuit dough cheeseburgers almost on autopilot.
Preheat your oven and prep your pan.
Set your oven to 375°F (190°C). Lightly grease a 9–10 inch cast-iron skillet or a baking dish (9x13 works well). A skillet gives you that pretty “pull-apart cheeseburger bombs” effect, but any baking dish is fine.Cook the ground beef and onions.
In a large skillet over medium-high heat, add the ground beef and diced onion. Cook, breaking up the meat with a spatula, until the beef is browned and the onion is soft, about 6–8 minutes. Drain any excess fat if the pan looks very greasy—this helps keep your cheeseburger bombs from getting soggy.Flavor the filling.
Turn the heat down to medium. Stir in the garlic, Worcestershire sauce, ketchup, mustard, smoked paprika (if using), salt, and pepper. Let this mixture cook for another 2–3 minutes, stirring often, until everything is well combined and the sauce thickens slightly. Taste and adjust seasoning—this is your moment to add a pinch more salt or pepper.Cool the beef mixture slightly.
This part matters: take the pan off the heat and let the beef cool for 5–10 minutes. You don’t want it piping hot or it can start melting the cheese before you stuff, making it harder to seal the biscuit dough.Stir in the cheese.
Once the beef is warm but not super hot, fold in 1½ cups shredded cheddar cheese. The cheese will soften but shouldn’t fully melt. If you like things extra cheesy, go closer to 2 cups—these are cheese stuffed burger bombs, after all.Prepare the biscuit dough.
Open the cans of biscuit dough and separate the biscuits. Use your fingers or a rolling pin to gently flatten each biscuit into a circle about 3–4 inches wide. Don’t make them too thin, or they might tear when you stuff them.Fill the Cheeseburger Bombs.
Place about 2 tablespoons of the cheesy beef mixture in the center of each flattened biscuit. If you’re using extras like diced pickles or crumbled bacon, sprinkle a little on top of the beef. Try not to overfill—if it’s bursting with filling now, it’ll try to escape when baking.Seal the bombs.
Gently bring the edges of the biscuit dough up over the filling and pinch them together firmly at the top, forming a sealed ball. Turn each one seam-side down in your hand and give it a little roll to make sure the seam is closed. This is key for neat, stuffed cheeseburger bites.Arrange in the skillet or baking dish.
Place each cheeseburger bomb seam-side down in the prepared skillet or pan. Snuggle them close together—they’ll puff and press into each other like pull apart cheeseburger bombs.Brush with seasoned butter.
In a small bowl, mix the melted butter, garlic powder, and dried parsley or Italian seasoning. Brush the tops of the biscuit cheeseburger bites generously. If you like, sprinkle a few sesame seeds over the top to mimic burger buns.Bake until golden and bubbly.
Bake in the preheated oven for 18–22 minutes, or until the Cheeseburger Bombs are richly golden brown and you can see a little cheese bubbling at the edges. If your oven runs hot, start checking at 16 minutes.Cool slightly, then serve.
Let the cheeseburger bombs rest for 5 minutes before serving. This helps the cheese set a bit so it doesn’t all run out when you pull them apart. Serve warm with ketchup, mustard, burger sauce, or even ranch for dipping.
Servings & Timing
- Yield: About 16 Cheeseburger Bombs (depending on brand/size of biscuits)
- Prep Time: 20 minutes
- Cook Time: 20 minutes
- Total Time: Around 40 minutes (plus 5 minutes cooling time before serving)
If you’re doubling the batch for a party appetizer cheeseburger tray, I usually plan on 2–3 cheeseburger bombs appetizer pieces per adult, more if this is the main dish.
Fun Variations on Cheeseburger Bombs
Once you’ve mastered the basic ground beef cheeseburger bombs, you can change them up depending on your mood or who’s coming over.
- Bacon Cheeseburger Bombs – Add 2–4 strips crispy crumbled bacon to the beef mixture or tuck a little bacon in each biscuit before sealing.
- Cheeseburger Sloppy Joe Bombs – Stir a bit more ketchup and a splash of BBQ sauce into the beef mix for a sweet-tangy sloppy joe twist.
- Spicy Jalapeño Cheeseburger Bombs – Add chopped pickled jalapeños and pepper jack cheese in place of some cheddar for a spicy kick.
- Cheeseburger Bombs with Crescent Rolls – Use crescent roll cheeseburger bombs if that’s what you have: cut the dough into squares, fill, then pinch into little bundles.
- Low-Carb “Deconstructed” Version – Skip the dough and serve the cheesy beef mixture over lettuce wedges, then top with shredded cheese and pickles (still call them burger bombs at home, though!).
- BBQ Ranch Cheeseburger Bites – Mix in a tablespoon of ranch powder with the beef and use a smoky BBQ cheddar cheese; serve with ranch dressing for dipping.
Honestly, once you get the basic pattern, this recipe turns into a choose-your-own-adventure.
How to Store & Reheat Cheeseburger Bombs
These mini cheeseburger bombs are pretty forgiving, which makes them great for meal prep and planning ahead.
Storing:
- Fridge:
Let the cheeseburger bombs cool completely, then store them in an airtight container in the refrigerator for up to 3–4 days. - Freezer:
You can freeze baked cheeseburger bombs on a parchment-lined tray until solid, then transfer to a freezer bag or container. They keep well for up to 2 months. Label the bag so you remember what they are—frozen things have a way of all looking the same after a while.
Reheating:
- Oven (best texture):
Preheat to 350°F (175°C). Place the cheesy beef biscuit bombs on a baking sheet and warm for 10–12 minutes (15 if frozen), until heated through. They’ll re-crisp on the outside and stay soft inside. - Air Fryer:
Heat at 320°F for about 5–8 minutes, checking often. You’ll get a nice lightly crisp exterior. - Microwave (fastest):
Microwave 1–2 cheeseburger biscuit bites at a time for 30–45 seconds. This is quick but can make the dough a little soft, so I reserve it for rushed lunches.
Make-Ahead Tips:
- You can assemble the unbaked Cheeseburger Bombs, place them on a parchment-lined tray, and refrigerate them for up to 24 hours before baking.
- If assembling ahead, cover tightly with plastic wrap so the biscuit dough doesn’t dry out.
- When ready to bake, brush with butter, sprinkle any toppings, and bake as directed. You might need an extra 2–3 minutes if they’re cold from the fridge.
Notes From My Kitchen (What I Learned Testing This Recipe)
- Don’t skip cooling the beef a bit before adding cheese. Hot beef will melt the cheese too much and make the filling greasy. Warm is perfect—just enough to soften the cheese without turning it into a sauce.
- Season as you go. I always taste the cooked beef mixture before adding cheese. Different brands of Worcestershire and ketchup have different saltiness levels, so adjust yours.
- Don’t overfill the bombs. I know it’s tempting to pack them, but overstuffing leads to leaky Cheeseburger Bombs that ooze in the oven. Aim for about 2 tablespoons filling per biscuit.
- Use a good nonstick skillet for the filling. Ground beef can stick and burn in a thin pan. A sturdy skillet (cast iron or a heavier nonstick) makes browning easier.
- Cheese choice matters. Pre-shredded cheese works, but it doesn’t melt quite as smoothly because of the anti-caking agents. When I have time, I grate a block of sharp cheddar—it makes the cheeseburger bombs extra gooey.
- Think about your crowd. For kids, I skip onions or chop them super fine and use mild cheddar. For adults, I go heavier on onion and mustard, and sometimes add pickles right inside.
And here’s a little trick: if you want a “big reveal” at a party, serve the whole skillet of skillet cheeseburger bombs in the center of the table and let people pull them apart. It looks much fancier than the ingredients would suggest.
FAQs About Cheeseburger Bombs
1. Can I use ground turkey instead of ground beef?
Yes. Ground turkey works fine for homemade Cheeseburger Bombs; just add a bit more seasoning and maybe a splash of olive oil if it’s very lean, since it can be drier than beef.
2. Can I make Cheeseburger Bombs without biscuit dough?
You can use crescent roll dough, pizza dough, or even small dinner roll dough instead. Crescent roll cheeseburger bombs tend to be a little flakier and softer.
3. How do I keep the Cheeseburger Bombs from leaking?
Don’t overfill, and make sure you pinch the seams very firmly. Placing them seam-side down and snuggling them close together in the pan also helps prevent leaks.
4. Are these Cheeseburger Bombs good for kids’ lunches?
Yes, they’re great kid friendly cheeseburger snacks. Pack them slightly warm in a thermos or let them cool and send with a small container of ketchup for dipping.
5. Can I add vegetables to make them a bit healthier?
Absolutely. Finely chopped bell peppers, mushrooms, or grated carrot can be cooked with the onions and beef. Just keep the filling from getting too watery by cooking off excess moisture.
6. What should I serve with Cheeseburger Bombs?
They pair well with a simple green salad, coleslaw, roasted veggies, or classic fries or tater tots if you’re going full comfort-food mode.
7. Can I make these Cheeseburger Bombs gluten-free?
Yes, if you can find a gluten-free biscuit dough or pizza dough, you can use that. Just check that your Worcestershire sauce is gluten-free too.
8. How will I know they’re fully baked?
The tops should be deeply golden brown, and if you lift one gently with a spatula, the sides should also look set and baked, not doughy. If the tops are browning too quickly, loosely tent with foil and continue baking.
Wrapping It Up: Why These Cheeseburger Bombs Deserve a Spot in Your Rotation
These Cheeseburger Bombs are everything I love in a weeknight or party recipe—simple ingredients, big flavor, and a fun, sharable presentation. Whether you bake them as a skillet of pull apart cheeseburger bombs for game day, whip them up as a family friendly cheeseburger recipe for dinner, or stash a batch in the freezer for busy nights, they just work.
If you try these Cheeseburger Bombs, I’d love to hear how you customized them—did you go spicy, add bacon, or keep them classic for the kids? Leave a comment, rate the recipe, or share your version with a photo. And if you’re in a snacking mood, you might also enjoy my other party appetizer cheeseburger ideas and easy game day snacks next time you’re planning a spread.
Read next
Snacks Appetizers
Almond Flour Crackers
Discover almond flour crackers that are gluten-free, crunchy, and easy to bake at home.
Snacks Appetizers
Buffalo Cauliflower Bites
buffalo cauliflower bites offer a spicy, crunchy veggie snack you can make at home. Discover a healthier twist on wings today.

Snacks Appetizers
Crispy Cheese Chips
Crispy cheese chips that melt in your mouth - snack perfection for any moment. Learn why cheese chips are your new go-to treat.
Snacks Appetizers
Diabetic Air Fryer Zucchini Chips
Discover diabetic air fryer zucchini chips that are crispy, low-carb, and easy to make at home.

Snacks Appetizers
Diabetic Friendly Air Fryer Pickle Chips
Discover diabetic friendly air fryer pickle chips, crisp and flavorful, guilt-free snacking that fits your diet.
Snacks Appetizers
Greek Yogurt Ranch Dip
Discover a creamy greek yogurt ranch dip that's lighter, tasty, and perfect for veggies or chips.